

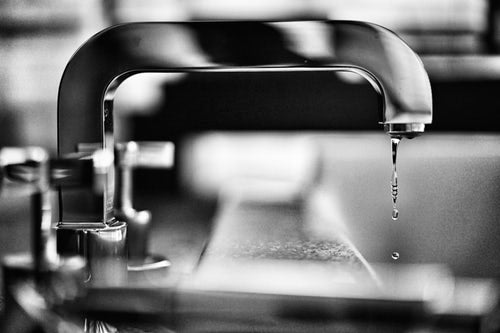
Do you find yourself spending more on your water bills every year? Leaking/ dripping taps are often an indication that damage is caused by valve seating, or that your tap washer needs renewing. It is important that you should check if the leak is coming from the mixer nozzle, if yes you will have to change both tap washers. The first step is to fix your faulty tap is removing the headgear.
Removing your taps headgear
Before you begin, ensure your water supply is turned off (this can be done at the service valves or at the main supply). Meanwhile, place the plug in the plughole to ensure no parts are lost (this step will save you both time and money) Now, when turn your tap on full no water should be running.
Next, you need to unscrew the cover of a non-rinsing spindle tap in order to expose the retaining screw. This can be done using a flat head screwdriver. Then, remove the screw and store it somewhere safe, you will now be able to remove the head of the tap. You may not have a non-rinsing spindle tap
You may not have a non-rising spindle tap but instead a rising spindle tap, if this is the case you need to prise off the index disc, which is in the centre of the handle; again, this can be done with a flat head screwdriver.
The next step is to remove the retaining screw in order to release the capstan (or the handle as its commonly known). We would advise using an adjustable spanner which you can wrap with a cloth to unscrew the metal and lift from the head gear nut.
Once you have done this, you will need to undo the larger headgear nut. This can be done using a spanner. If you find that the nut is stiff (in most cases), take care and ensure you do not force the nut. If you come across this problem, you should brace the tap body with you hand and twist. It is important that you do not turn the tap whilst releasing the headgear, as this could lead to damaging the pipe or fracturing it. If this happens a plumber may be the only solution to fixing the problem. If the nut is still proving difficult to turn, we advise visiting your local DIY store and purchase some penetrating oil.
By rubbing the oil around the joint and allowing ten minutes for it to soak in, it should become must easier to turn. You may find that sometimes you must apply a few layers for it to loosen. As a final alternative, using some direct heat (we suggest a blow torch or electric paint stripper) can loosen it.
Replacing your washer
When your tap is leaking or dripping you replace the washer in order to stop it. To begin, prise off the washer with a screwdriver and you will find a small nut protecting your washer – this is to be unscrewed.
In order to do this, you will most likely use an 8mm spanner. Again, if the screw is difficult to loosen use some penetrating oil. The next step is to then prise off the washer. It is apparent that sometimes the nut is too tight and cannot be removed – if this occurs do not worry, you can replace both the jumper valve and the washer unit as one.
The next step is fitting your new washer and jumper valve. To do so, grease the threads on the base of your tap before you reassemble it. This can be done with either Vaseline or specialist silicone gel from all building/plumbing merchants.
Repairing the valve seating
The valve seating is one of the main reasons that may be why your tap is leaking. When your valve seating is rough or scored because of the grit, the seal between the washer will not be effective- this is because your new washer will still let water through. The best solution is to visit one of your local DIY stores and purchase a combined washer and seating set. Within this contraption, you will notice a plastic set part. This will fit into the valve seat along with a washer and jumper valve unit which will fit into the headgear.
While the tap is turned off, the plastic seating will be forced into a sturdy position. Please note: It may take a couple of days for the new seating to give a completely watertight seal. If you do not want to wait this time, we suggest buying/hiring a reseating tool. This tool allows you to grind down the seat until it is smooth again, this is a simple yet more expensive alternative.
Your ceramic disc taps
Compared to the normal and conventional taps that use washer and have a main spindle, a ceramic disc tap is completely different. Ceramic disc taps work by having a cartridge in the body of the tap which contains two ceramic discs (each with two holes on them). One of the discs will be in a fixed position and the other rotates as the handle is turned.
The rotating disc then moves the holes within it and matches them up with the holes on the still disc. This allows water to flow through. Once the tap is tuned off the disc rotates and the holes are no longer aligned, which stops the water flow. If you find that your ceramic disc is scratched, it will most likely result in a leaking/dipping tap. In this instance, you must replace the entire cartridge.
Note: The left- handed disc is for the hot tap and the right hand for the cold. Take the faulty piece with your local plumbing merchants to ensure you purchase the right size and left or right-handed piece. It is important that your ceramic tap could be leaking due to the seal at the bottom of the cartridge has been perished.
How to check your ceramic discs
- To begin, turn off your water supply and pull the tap handles off. To do this, use a spanner and unscrew the section (commonly known as headgear).
- Next, you need to carefully remove the cartridges, and check if either is damaged. Note: remember which cartridge is hot and cold. There is a chance that your cartridges will be worn. If this occurs, you will need to replace them with identical parts for your tap.
- Also, it is important to ensure when fitting these again that they are fitted into the correct part. Your cartridges may not be worn, but if they are dirty you can simply clean them with a damp cloth.
- In some cases, the rubber seal can become damaged, this is to be replaced if this happens (cartridges to be fitted into the appropriate taps).
The recipe for curing your leaking tap
If you have an annoying leaking tap then its likely that its because of the faulty glands. Here’s some tips to check if this is the case;
- If the leak is forming the body of the tap, around the spindle, the base of the swivel spout, or the diverter level on a shower mixer tap – it is your glands
- The glands are the seal between the body of your tap and the spindle or O-ring seal.
- The reason for this type of problem is fairly simple and is common amongst kitchen taps.
- In most cases, soapy water from hands will run down the spindle and wash out the grease of the gland which keeps the joint completely watertight.
Note: modern taps often don’t have a gland, instead they use an O-ring seal function. It is highly likely that this will need replacing, unless it is fairly old where you should look out for general wear and tear.
How to adjust the gland
Note: Before you begin, it’s important to know that to adjust the valve, you do not have to cut off the water supply- just simply turn the tap off.
- To begin, undo the small screw that secures the capstan handle in a safe place (it is easy to lose if not) and then remove the handle. If you cannot see the screw, the handle should simply come away.
- You should then see a bell-shaped cover that is over the whole tap – you will need to remove this to then see the gland nut. This is the highest nut on the spindle; simply tighten the nut roughly half a turn with a spanner.
- Next, turn the tap on for a short moment, do this by slipping the handle back on. You can now check to see if the leak is still from the spindle.
- Hopefully, the leak is not from the spindle, in which case you can turn the nut another quarter urn and reassemble the tap. Note: Over tightening the nut can make the tap difficult to turn off.
- If you find the gland is still leaking you will need to turn the nut off another half turn and check again. In some cases, there leak will remain- if this occurs you will need to repack the gland.
How to replace and repack
- This can be done by completing steps 1-5 as shown above.
- You need to get to the phase of the tap being turned off and the handle and cover being removed.
- Next, use a spanner to remove the gland nut. For this, you will need to remove the old packing, this can be done with a sharp tool or screwdriver.
- Then replace the old packing with packing string (this can be purchased from any plumbing merchant).
- Using your screwdriver, pack in and replace the gland nut and reassemble your tap.
This concludes all the different methods to fixing your leaking tap. In most cases, it can be simply the materials have been used. By buying higher quality materials may cost extra, but will save money, time and effort when it comes to discovering a leaking tap
For further help and advice- contact our sales team on 01482 714488
