

How to repoint Damaged Brickwork
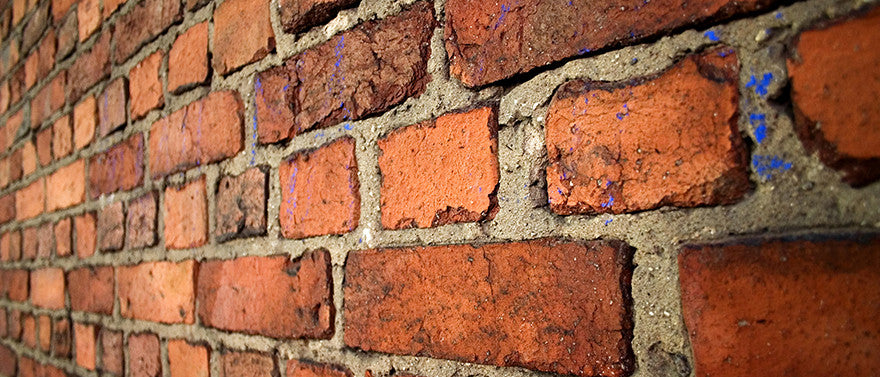
The brickwork on your property has to stand up to a lot, and after a cold, wet winter, there’s a chance you might need to repair it. Over the years, bricks can become damaged, and the mortar between brickwork will start to weather.
If left unattended, this can allow water to penetrate, which can damage the brickwork further, and in extreme cases, compromise the structure of your home!
Whether your mortar is eroding, or your bricks are damaged, repointing your walls will help to protect your property and refresh the exterior of your home. Whilst pointing can be fairly tricky, there’s no reason you shouldn’t attempt it if you’re an experienced DIY’er. Here’s how.
Difficulty – Fairly Advanced
Duration – Depending on the scale of your wall, set aside a few days or a weekend.
You’ll Need:
- Raking bar
- Hammer
- Chisel
- Hose pipe/water spray
- Mortar board/piece of plywood
- Wheel barrow/mixing bucket
- Knife jointer/pointer knife/trowel
- Builders sand
- Hydrated lime
- Cement
- Wire brush
Step 1 – Inspect Your Wall
The first thing you need to do is inspect your wall for potential trouble spots. Mortar erosion in isolated areas could be the result of blocked drains or faulty guttering and so it’s important to fix these problems before you repoint
Before you start, be aware of outside lighting – in many cases, the wiring from fixtures is hidden within the joints of your wall, so make sure you isolate the circuit before chipping away.
If you are repointing around window or door frames, work carefully when clearing these joints as being heavy handed could affect the way that fixtures open or close.
Step 2 – Clearing The Joints
Working from top to bottom to avoid falling debris getting caught in your newly cleared joints, work with your hammer and chisel to remove the vertical (or head) joints. By working on the head joints first, you will minimise the risk of chiselling into newly exposed brick above or below.
Working on a few rows at a time, you can then use your raking bar to work out the horizontal, or bed joints. Where you can, try to keep the depth as even as possible – depending on the spacing of the joints, you don’t want to be digging much deeper than an inch. The tapered end of a raking bar will help to stop you digging too deep.
For more modern walls with particularly solid joints, you may want to use an angle grinder for this job. Angle grinders will make the job much quicker, but if you are repointing an older or stone wall (for example) you risk grinding and damaging the masonry if you aren’t careful.
If you do opt to use an angle grinder, the correct technique would be to grind a single line in the middle of the joint to avoid damage to the brickwork before chiselling towards the cut groove. Always wear the appropriate protective gloves and goggles.
Step 3 – Mixing Your Mortar
Be sure not to use a mortar that is too hard: bricks swell, and you need to allow for this movement. Using a mortar that sets harder than the bricks can ultimately crack and break your bricks, it’s best to use a more traditional lime-based mortar, which will allow the wall to breathe more naturally.
A common mixture of 6:1:1 of builder’s sand/hydrated lime/cement is the best for most repointing jobs. Measure your amounts carefully to aid consistency, and as a quick test, make sure your mortar is able to stand up on the trowel without sagging.
Step 4 – Replace Any Loose Bricks
Before you begin, spray the wall down with water – a dry wall will suck the moisture from your brand new mortar and cause it to crack.
If you are working on a wall that is particularly damaged, you will need to replace any bricks that are cracked and broken. Make sure to remove all loose mortar behind broken brickwork to allow plenty of room for the new brick to fit.
Step 5 – Get Repointing!
Again, start from the top of the wall and work your way down. If your foundations have suffered from damp, make an exception and work these first (about half a metre), allowing more time for them to dry. Scoop a generous amount of your mortar to your mortarboard and get to work with your trowel or repointing knife, making sure to pack your joints nice and tight. You don’t want any air or space behind it.
Don’t worry about excess at this point. Work on a few rows at a time, beginning by filling the bed joints and then the head (vertical) joints.
Depending on your desired finish, you can either shape the mortar with different tools (such as cylindrical rods for a hollow key finish, or your pointer knife for a flush finish) or you can remove the excess mortar with a wire brush after you have allowed a couple of hours of drying time. Using a wire brush will clean up your brickwork in the process and leave you with a nice weathered-flush finish that is slightly lower than the wall.
How Eurofit Can Help
At Eurofit, you’ll find many of the tools you’ll need to successfully complete your brick repointing in the DIY tools section of our website.
Our tools aren’t just available at unbeatable prices, they’re also professional grade, so that much like your newly repointed brickwork, they’ll be built to last!
