

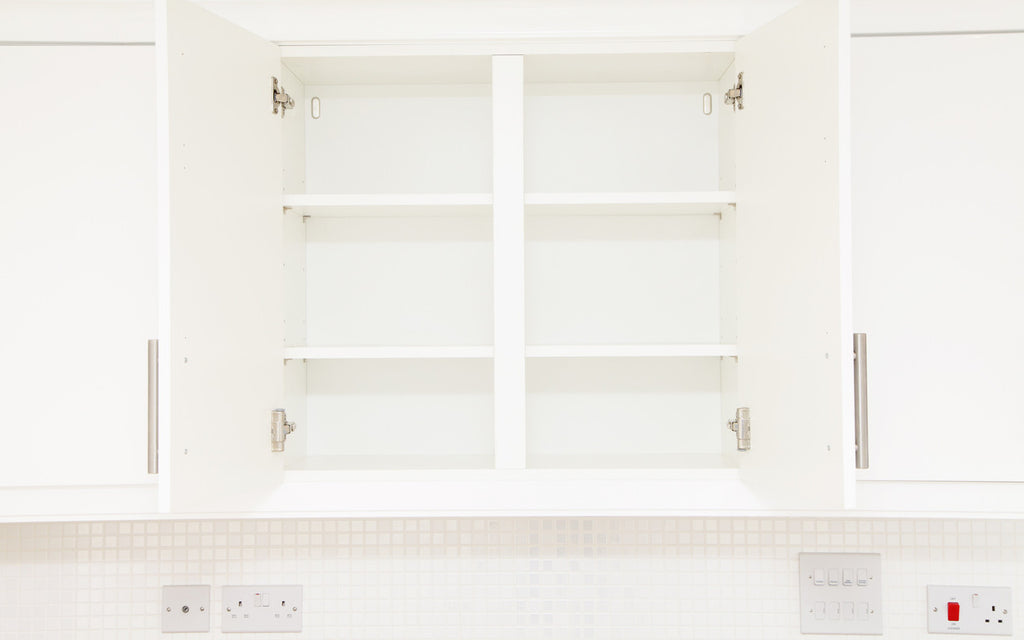
HOW TO: Build a Kitchen Cupboard
💪 DIFFICULTY RATING: 80%
⏱ TIME: 4 to 5 Hours
Whilst there may be a huge number of flat-pack or pre-made kitchen cupboards on offer, you may find it easier and more rewarding to craft your own, if you’re building your kitchen from scratch or working on your own renovations. Not only can this be an incredibly satisfying DIY job, it also allows you to create the perfect fit for the kitchen design you’re after.
Whilst size and specification may vary, the basics of putting together a kitchen cupboard pretty much remain the same. Here’s a brief guide to what you’ll be needing:
MDF/Plywood
1x6 Lumber (the choice of wood is your’s!)
Wood Glue
Wood Putty
Dowels (Available at Eurofit Direct)
Corner Brackets (Available at Eurofit Direct)
Hinges (Available at Eurofit Direct)
Knobs / Handles (Available at Eurofit Direct)
Drawer Slides (Available at Eurofit Direct)
Flathead Screws (Available at Eurofit Direct)
Finishing Nails
Clamps
A Drill
A Sander
Sandpaper
A Jigsaw router
Measuring Tape (Available at Eurofit Direct)
A Spirit Level
STEP 1: Plan the Design
The first thing to consider here is measurements. Most basic cupboards are around 24” deep in order to allow for a countertop of around 25” with a slight overhang. Likewise the height of your average cupboard is around 35” in order to allow for a height of 36” once a countertop has been added.
Cupboards that are to be mounted on a wall rather than on the ground differ slightly in size, the depth for these cupboards is usually around 14”. To calculate the potential size range for wall cupboards, add 20” to the height of the counter, then subtract this from the overall height of the room to find the size range in which you’ll be able to create wall cupboards.
STEP 2: Cutting the Panels
Start by cutting the side panels from ¾” plywood. For this example, the side panels need to be 34.5” tall and 24” wide. A toe kick for the cupboard can be added by clamping the two side panels together, before using the jigsaw cut to create a 3x5.5” notch into a corner of the panels. This will become the bottom front corner. NOTE: this step can be skipped if you’re creating a wall-mounted cupboard. With this job complete, you can move on to the next step, once you’ve unclamped the side panels.
You’ll need to cut a bottom panel to be 24” deep, with the width of the panel being dependent on the dimensions of your kitchen. TIP: it should match the total intended width of the cupboard minus the width of the two side panels.
Next, you need to cut the two base panels, using a piece of 1x6 lumber which suits your intended design, before cutting another two pieces of 1×6 to the same specification. This will be used to brace the upper portion of the side panels.
Finally, cut out two panels of 1×6 to serve as face panels and dividers for the cupboard, the height of which should be the intended distance between the top of the bottom panel and the bottom of the lower top bracer.
STEP 3: Beginning the Construction
To start the construction process, line up the flat face of one of the base panels with the back edge of the bottom panel. Then line up the other base panel 3” away from the other end of the bottom panel to form the toe kick, before ensuring that both these pieces are glued securely in place before drilling pilot holes to lock the pieces together using screws.
The next step is to attach the side panels to the base that you just constructed, before aligning the base so that the section cut out for the toe kick matches up with the shape of the base and that all of the edges are flush. Secure the sides with wood glue and screws in the same manner as the previous step. You should use clamps and measure carefully to ensure that an accurate 90-degree angle is created between the side panels and the base.
STEP 4: Putting it all Together
Using the wood glue, fit into place the top upper brace so that it is flush with the back edge of the cupboard and should rest comfortably against the wall, before fitting the second brace in the same manner. TIP: The distance between the two should be enough to accommodate a drawer of your choosing.
Once the top braces are in place, trace and mark out the outside frame of the back of the cupboard and then cut out a back panel to fit from the plywood used earlier. Glue and screw this into place, ensuring that it is on securely and flush with the rest of the cupboard.
Next, you need to slide in the face panels at regular intervals throughout the cupboard. TIP: they should be inserted as such to fit with the size of the doors and drawers that you intend to install on the cupboard, so that the drawers and doors will be in line with each other.
To secure the face panels you can insert screws through the lower top brace, ensuring that the screw is flush or slightly sunk into the surface of the brace. TIP: At this point it can be useful to reinforce all of the connections within the cupboard, attach corner brackets and screws to all connections to ensure that they’re firmly together.
Once the cupboard itself has been constructed, use wood putty to cover up and screws and ensure that all surfaces are smooth and flush with each other.
STEP 5: Final Steps
The final steps are to install drawer and door units. Start by cutting out two pieces of 1×6 with the same width as the face panels but with a height equal to the space between the two top braces. These can then be inserted and installed in the same way as the face panels, ensuring that they line up properly with the face panels.
THE EXTRAS…
When it comes to cupboard doors, we recommend simply buying suitable doors to install, as making your own cupboard doors beyond a simple piece of wood requires very specific tools and knowledge. Once you’ve made your selection, use our guide to installing a cupboard door to finish off the cupboard. Finally, you can finish off the project by painting or staining the cupboards followed by a coat of wood finish to protect your beautifully-handcrafted kitchen cupboards.
